
Classification
Classification is the menu with the lists that organise your catalogue: collections, sizes, colours, manufacturers, attributes and categories. You fill them in once here and then choose them from the product cards, while they also appear in the store. It has six tools:
AI tools: in the Manufacturers, the text of each manufacturer has the tools AI description (searches the brand on the internet and writes a description) and Translate into other languages. They work when the connection to ChatGPT or Claude is active in the Platform Settings.
Collections Tool
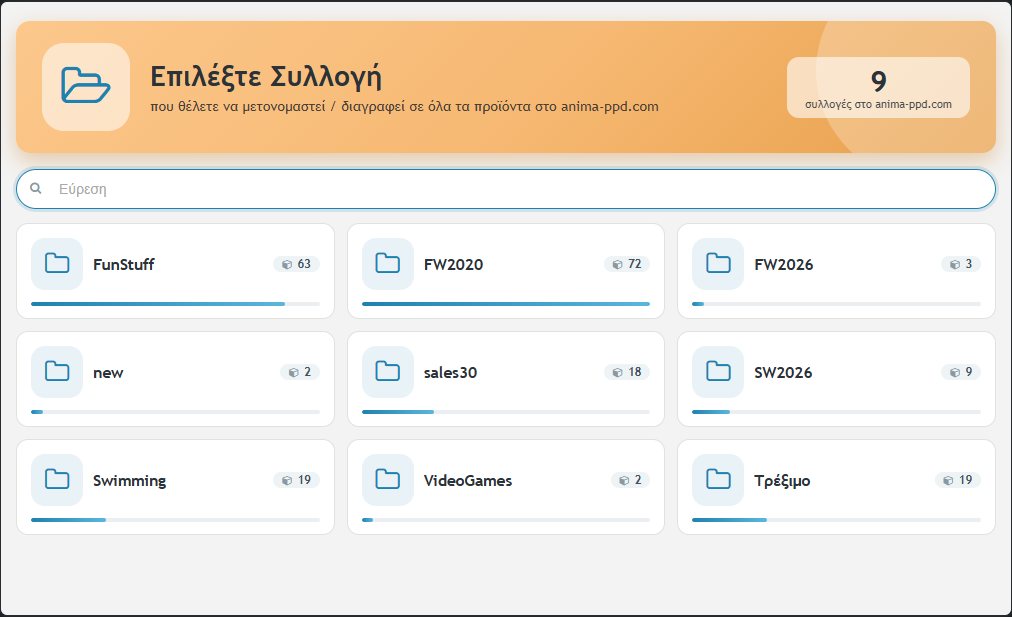
Renames or deletes a collection (e.g. “FW2020”) across all products. Collections are not a separate list; they exist only as a tag on the products, which is why this tool finds them and shows them as cards with the number of their products. It also has a search.
- Without selected products: renaming changes the name on all products that have the collection, and deleting removes it from all (the collection disappears).
- With selected products: the change is made only to those; the others keep the old collection (in renaming the collection “splits” into two).
- The products themselves are never deleted.
Caution: the action is irreversible for the whole database. Try it first on a few products if you are not sure.
Size Chart
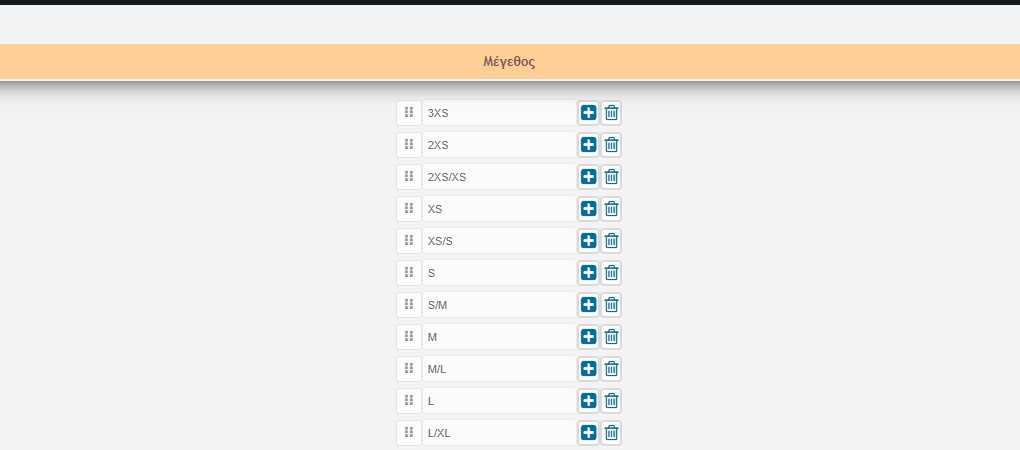
The list of all the sizes you can give to products (e.g. XS, S, M, L, XL, ONE SIZE, numeric). These are used in the Barcode / Size / Stock rows of Add Product.
- Add: the + button next to a row adds a new size.
- Delete: the bin removes the row.
- Order: drag a row by its handle to change its position.
- Press Save for the changes to take effect (or Cancel).
Color Chart
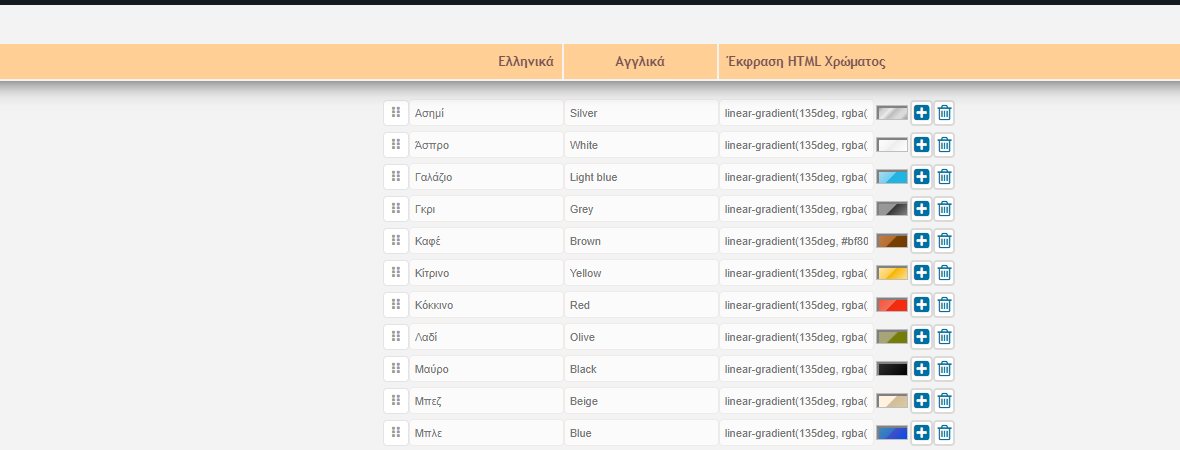
The list of colours you choose on products (the “Add colours” field). Each row has:
- Greek and English name of the colour.
- HTML Colour Expression: the code that defines how the colour looks (a colour, a gradient or an image), with a sample next to it, so you immediately see the result.
Adding, deleting and changing order are done as in the Size Chart, and you save with the Save button.
Manufacturers
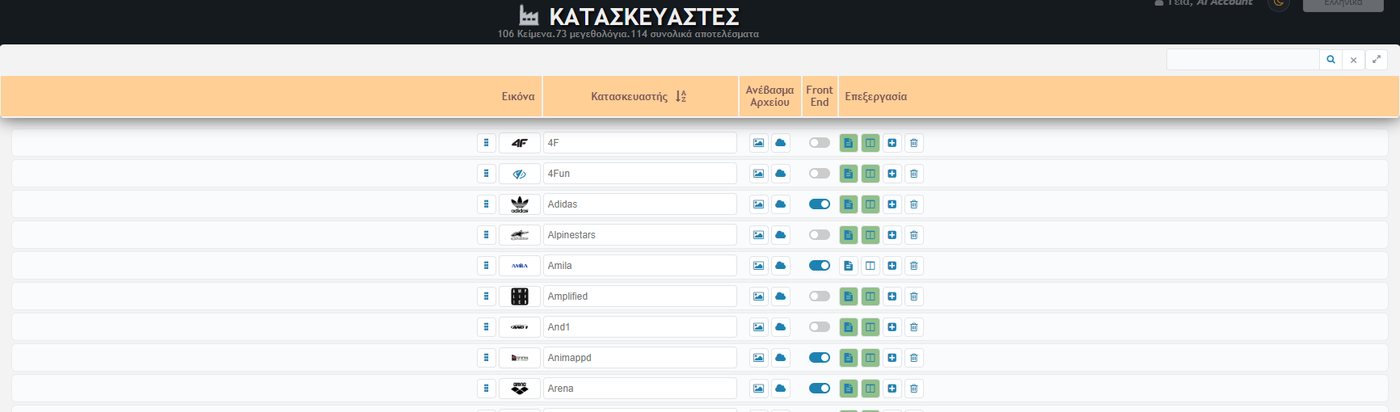
The store’s manufacturers / brands. At the top there are counters (e.g. how many texts and how many size charts have been registered out of the total). For each manufacturer there are:
- Image (logo): you upload it from your computer or choose it from the platform’s images (icons in the “File Upload” column).
- Manufacturer name: edited directly in the row.
- Front End: the switch that defines whether the manufacturer appears in the store.
- Manufacturer text: a description of the brand, with a text editor and preview. With AI active, above the editor there are the AI description and Translate buttons.
- Manufacturer size chart: images of size tables that appear on its products, per category. To work correctly, register the main categories first and then the subcategories (e.g. category > subcategory).
- + and bin: adding a new manufacturer and deleting.
Attributes
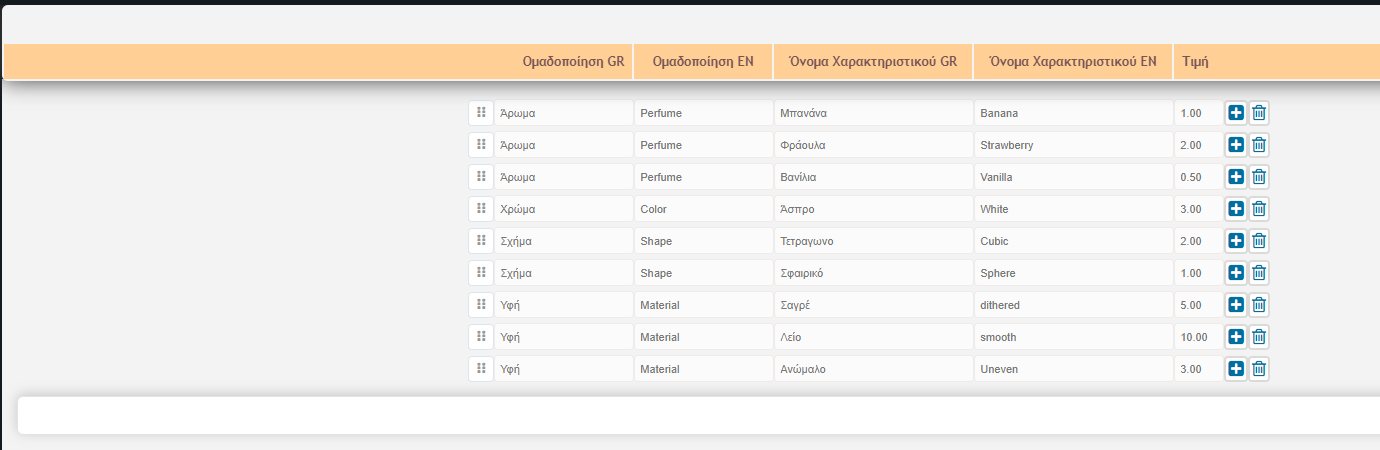
Attributes are options you define for products and the customer chooses in the store (e.g. scent, shape, texture of a candle). Each row has:
- Grouping GR / EN: the title of the group (e.g. “Scent”). These groups are the switches you activate in the Product attributes tab of each product.
- Attribute Name GR / EN: the specific option within the group (e.g. “Banana”, “Strawberry”).
- Price: the extra cost of the option (e.g. 1.00).
Menu Categories
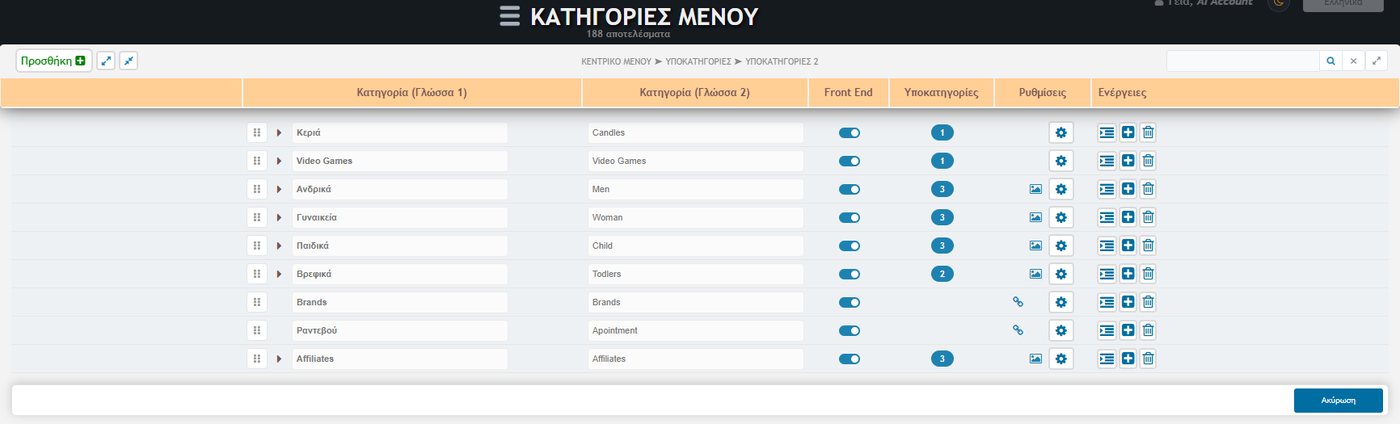
The tree of the store’s categories, in up to three levels (main menu, subcategories, subcategories 2). From here come both the categories you choose on products and the store menu.
- Name in two languages: “Category (Language 1)” and “Category (Language 2)”.
- Front End: the switch that defines whether the category appears in the store.
- Subcategories: the number shows how many it has. You open a category with the arrow and navigate through the path shown at the top.
- Settings (gear): you can set an image for the category (with height in px) or make it a link (internal link) and choose where it opens: same window, new tab, parent or top frame.
- Actions: + for a new subcategory, bin for deletion, and a handle to change the order by dragging.
- Add: the green button at the top left adds a new category; there are also buttons for expanding / collapsing all, as well as search.
As in the other screens, the changes take effect when you press Save.