
Appointments
All fields are configurable. Each field and each section of the form can have any name (Greek and English), any icon and be shown or hidden. The name you set follows everywhere: in the customer’s form (FE), in the schedule and the management cards (BE), in the printout and in the notification email. The names you see in the article (e.g. “Car make”, “Plate”) are the defaults. See Appointment Setup.
The Appointments section lets customers book appointments online from the store and lets you manage them in a daily schedule. The article has two parts:
- The customer part (Front End): the appointment form as the customer sees it.
- The management part (Back End): the appointment schedule and its settings (Appointments, Appointment Setup).
The default form is made for a car garage (make, model, plate, tasks). The titles and icons of the fields, the choice lists and the working hours change from the settings, so they fit your business.
Front End: the customer’s appointment form
The form is a page of the store (“Appointment Form”). The customer doesn’t need an account. The form is divided into sections, and whatever you don’t want you can hide from the settings.
1. Your car
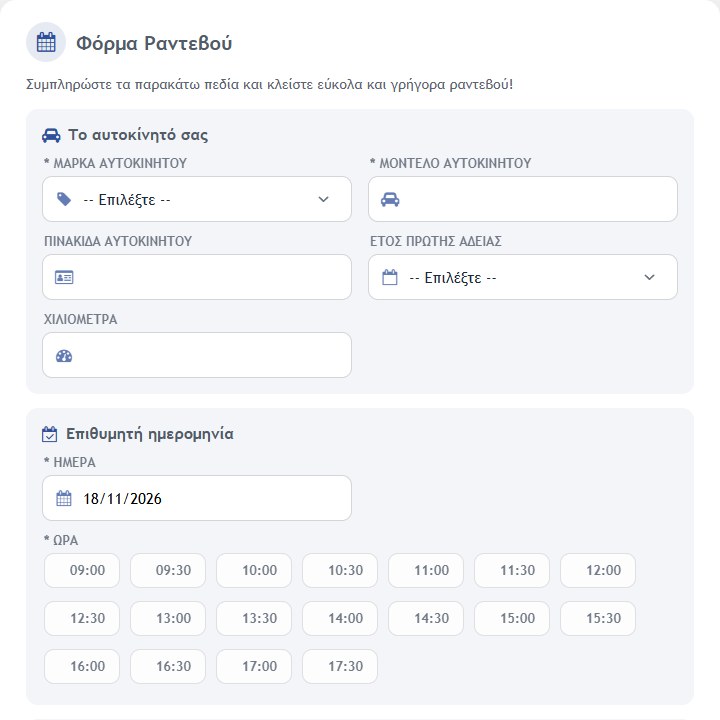
The customer fills in the make (choice list), the model, the plate, the year of first registration and the kilometres. The asterisk (*) shows the required fields: the make and the model are required as long as they are displayed. Which fields are displayed you set from the settings.
2. Preferred date and time
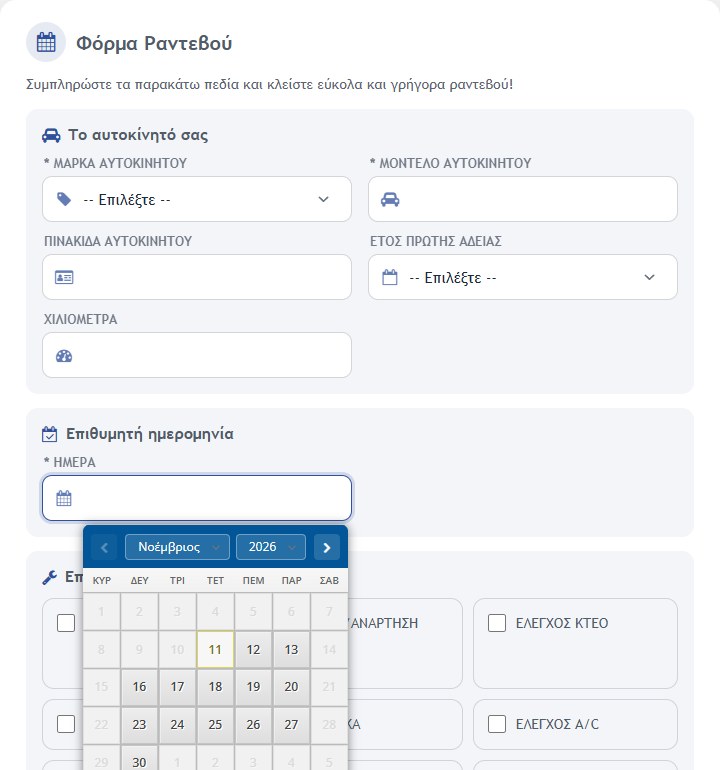
- Day: with a click on the field a calendar opens with month and year selection and a “Today” button. Past days and weekends cannot be chosen.
- Time: as soon as they choose a day, the hours of the schedule appear. The free hours are chosen with a click. Hours that have already been booked appear grey and cannot be chosen, and on hover they say they are booked. This way two customers cannot book the same hour.
3. Preferred task
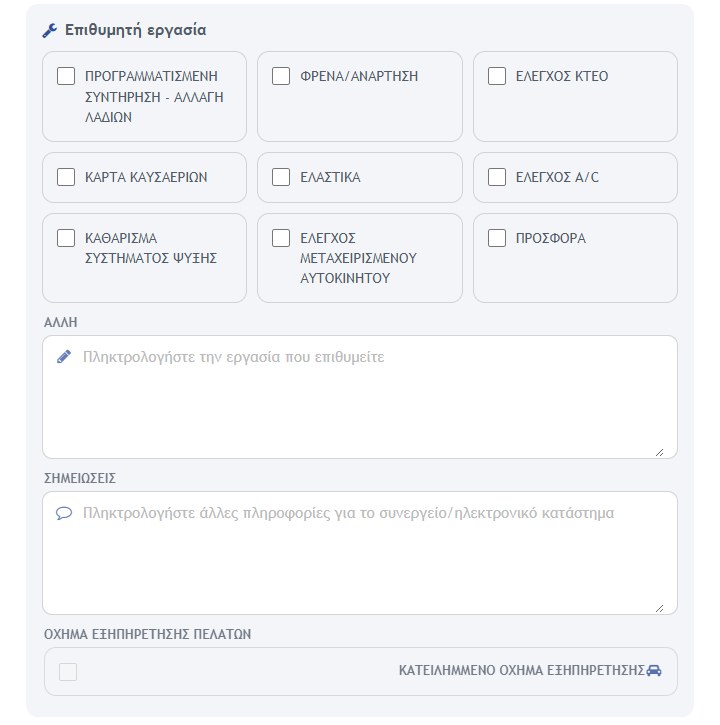
- Tasks: checkboxes with the list of tasks you have defined (e.g. scheduled maintenance, brakes, MOT inspection, tyres). They can choose more than one.
- Other and Notes: free text for anything not in the list.
- Customer courtesy vehicle: if you have a vehicle, the customer can ask for it to be provided for the duration of the appointment. When the vehicle is reserved, the option appears disabled with a relevant message. Available / reserved is set from the BE schedule.
4. Your details and the pick-up
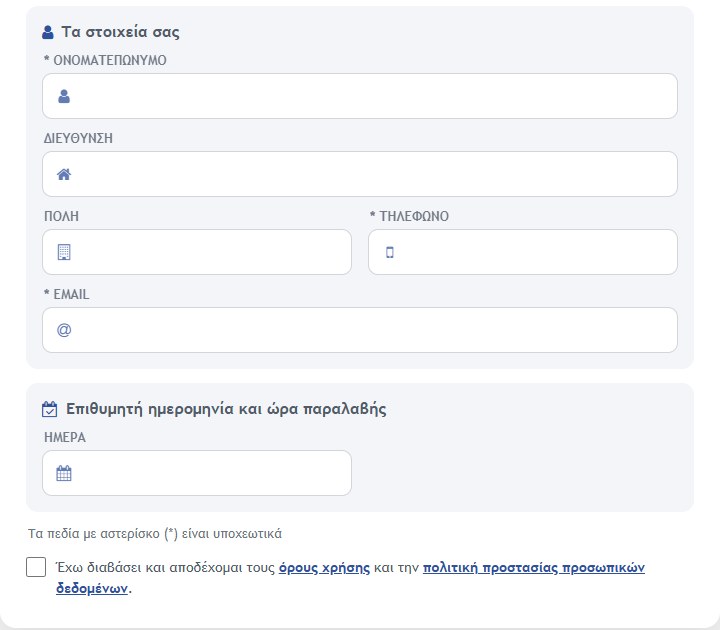
- Details: full name, address, city, phone and email. The name, phone and email are required as long as they are displayed, and the email must be valid.
- Auto-fill: if the customer is logged in, the details are filled in by themselves from their account and the form says so.
- Pick-up date and time: an optional section for when they will collect the vehicle, with the same calendar and the same hours.
- Terms of use: the customer must tick that they have read and accept the terms of use and the personal data protection policy (the links open the texts in a window). The send button appears only after the tick.
What happens when they press “Submit”
- The form checks the required fields and that a time has been chosen.
- If the time has in the meantime been booked by someone else, a warning appears that the form has already been sent and the appointment is not registered.
- Otherwise the appointment is saved and appears immediately in the BE schedule. The customer sees a success message and a notification email is sent, based on the “Apointment Notification” template of the Email Templates (in the customer’s language).
- If they asked for the courtesy vehicle, the vehicle automatically becomes unavailable for the next ones.
Back End: management
In the Appointments menu there are two pages: the appointment schedule and Appointment Setup.
Appointments: the daily schedule
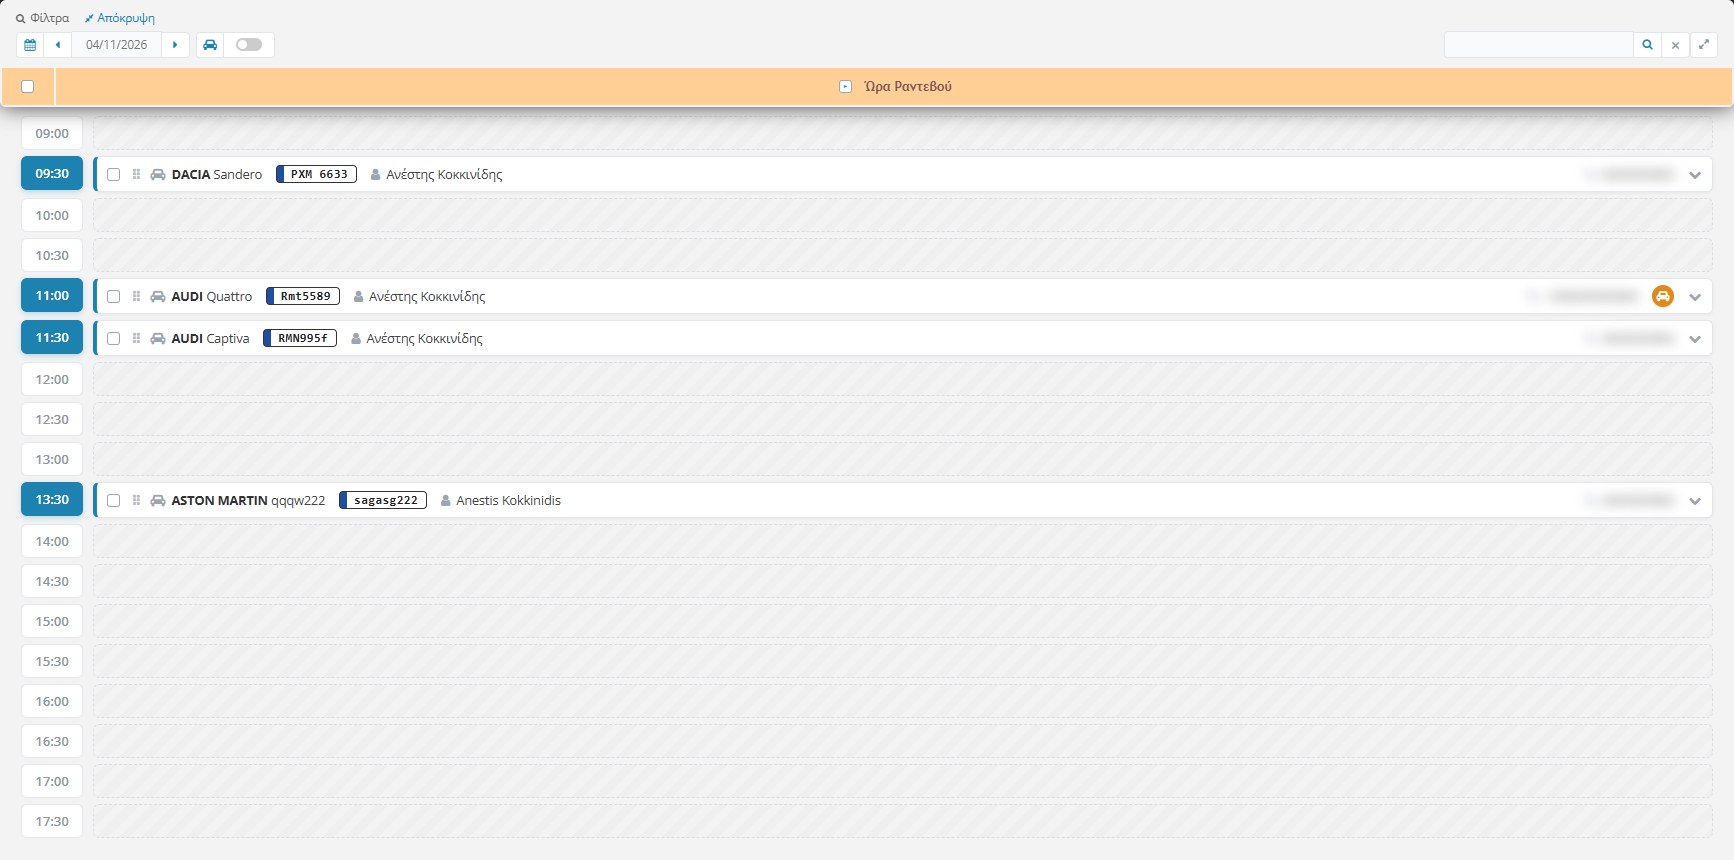
The page opens on the schedule of the day. At the top it states how many hours the day has and how many appointments were found (e.g. “20 entries, 4 results”). Each hour of the schedule is a row:
- Booked hour: the hour is blue and the row shows the vehicle (make and model), the plate, the customer’s name and phone. An orange car icon means the customer asked for the courtesy vehicle.
- Free hour: a row with grey hatching.
The toolbar
- Date: the calendar icon opens a picker, and the arrows ◂ ▸ go to the previous or next day.
- Courtesy vehicle: the switch defines whether the vehicle is available. This way you control whether customers can request it from the form. It appears only when this field is active in the settings.
- Search: by email / username, full name or phone. When you search, the page shows appointments from all days in the form of “Appointment search” and not the day’s schedule.
- ▸ in the header: closes all open cards.
Opening an appointment
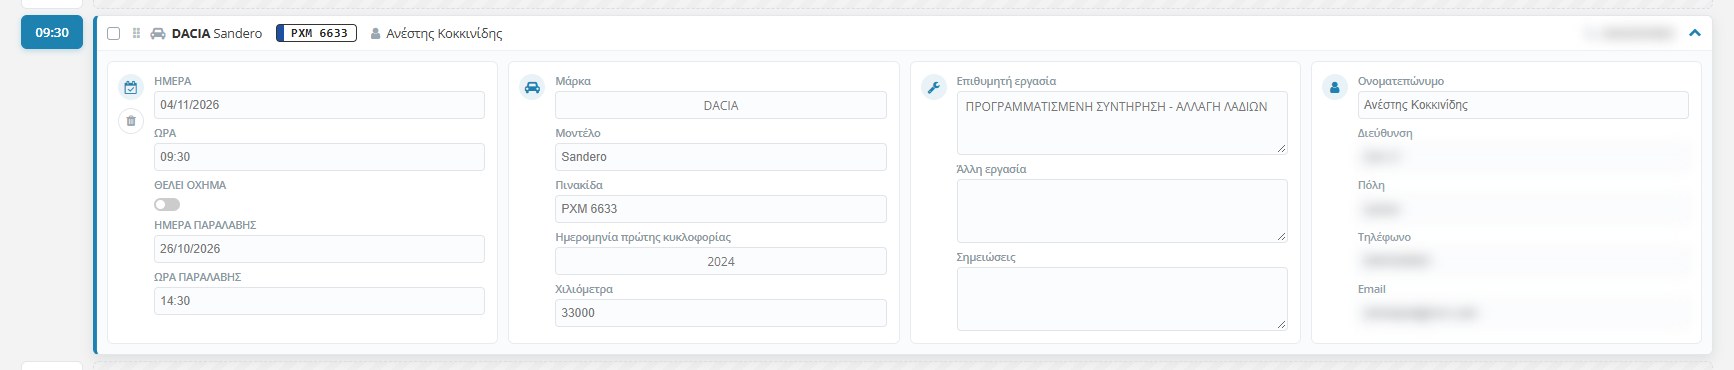
With a click on the row (or on the arrow on the right) the appointment card opens with four boxes:
- Date: day and time of the appointment, the “Wants vehicle” switch and the pick-up day and time. When you change the time, a window opens with the free hours of the day. The bin in the box deletes the appointment (with confirmation).
- Vehicle: make, model, plate, year of first registration and kilometres.
- Task: the preferred task, “Other task” and the customer’s notes.
- Customer: full name, address, city, phone and email.
All fields are editable. After you change something, the row’s save button (floppy disk) saves it. The boxes you see depend on the fields you have activated in the settings.
Moving an appointment
You can drag an appointment by the handle (three dots) to another hour of the same day. If the destination hour is taken, its appointment and those immediately following are pushed one hour down until the first free hour. If they don’t fit below, they move up. Each move is recorded in the action Log.
Actions on many appointments
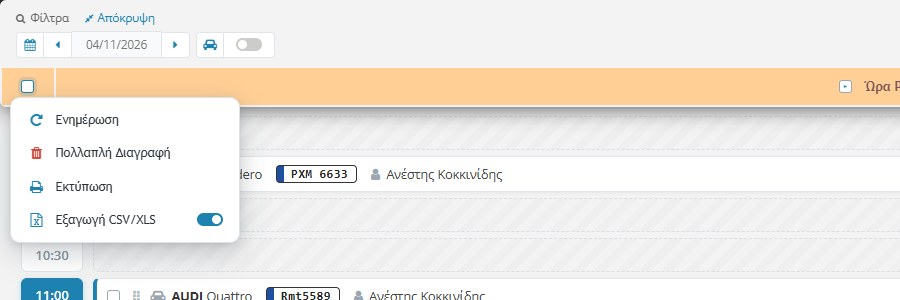
Tick the appointments you want and choose from the menu:
- Update: saves the changes of all the selected ones.
- Multiple delete: first shows a confirmation page with the list of appointments that will be deleted. Deletion cannot be undone.
- Print: opens a print sheet with the details, tasks, notes and email of each appointment.
- CSV/XLS Export: exports the selected appointments to a file. The switch next to it chooses the format.
Personal data: the appointments contain customer details (name, phone, email, plate). Be careful where you save or leave the files you print or export.
Appointment Setup
Here you define what the customer’s form is like. At the top there are the Save and Cancel buttons and on the left the menu with three sections.
Section Display Settings
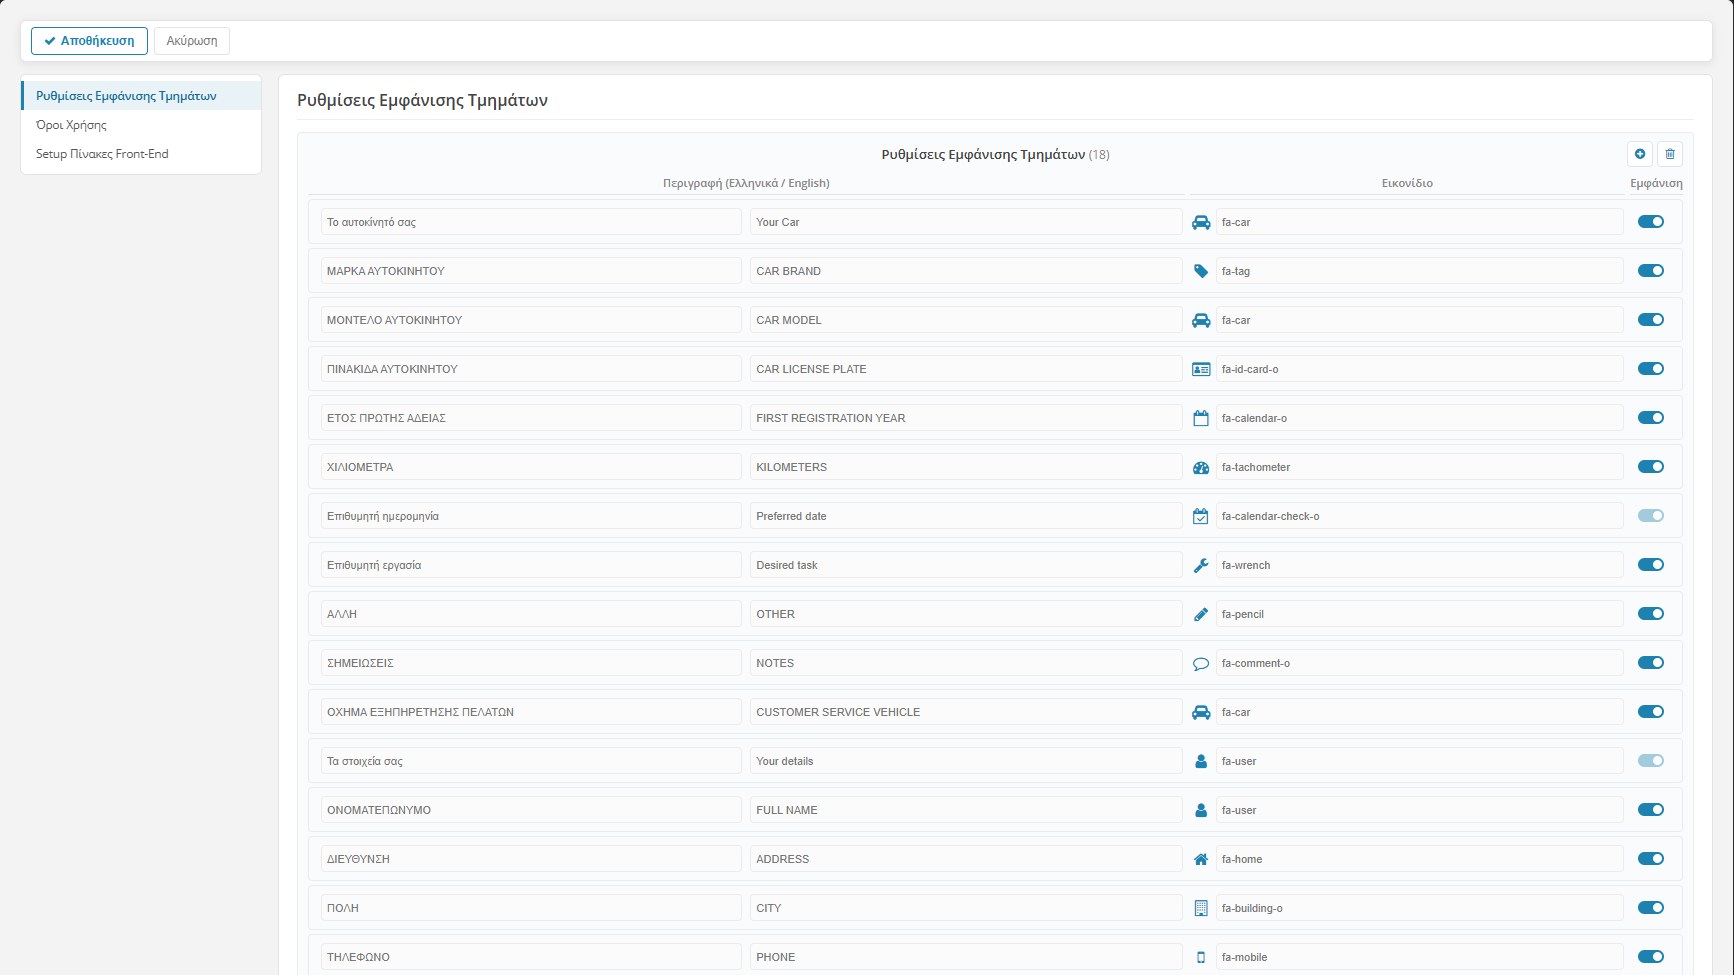
The list has 18 rows, one for each section and field of the form, in the order they appear. For each one you define:
- Description (Greek / English): the text the customer sees (e.g. to say “MAKE” instead of “CAR MAKE”). It also changes in the BE and in the email.
- Icon: the name of a Font Awesome icon, e.g.
fa-car,fa-scissorsorfa-paw. Next to it the preview appears immediately. - Display: the switch shows or hides the field or section. The sections “Preferred date” and “Your details” are always visible and their switch is locked.
With these tools the form can become, for example, an appointment form for a hair salon: you hide the vehicle details, rename the sections and change the icons.
Terms of Use
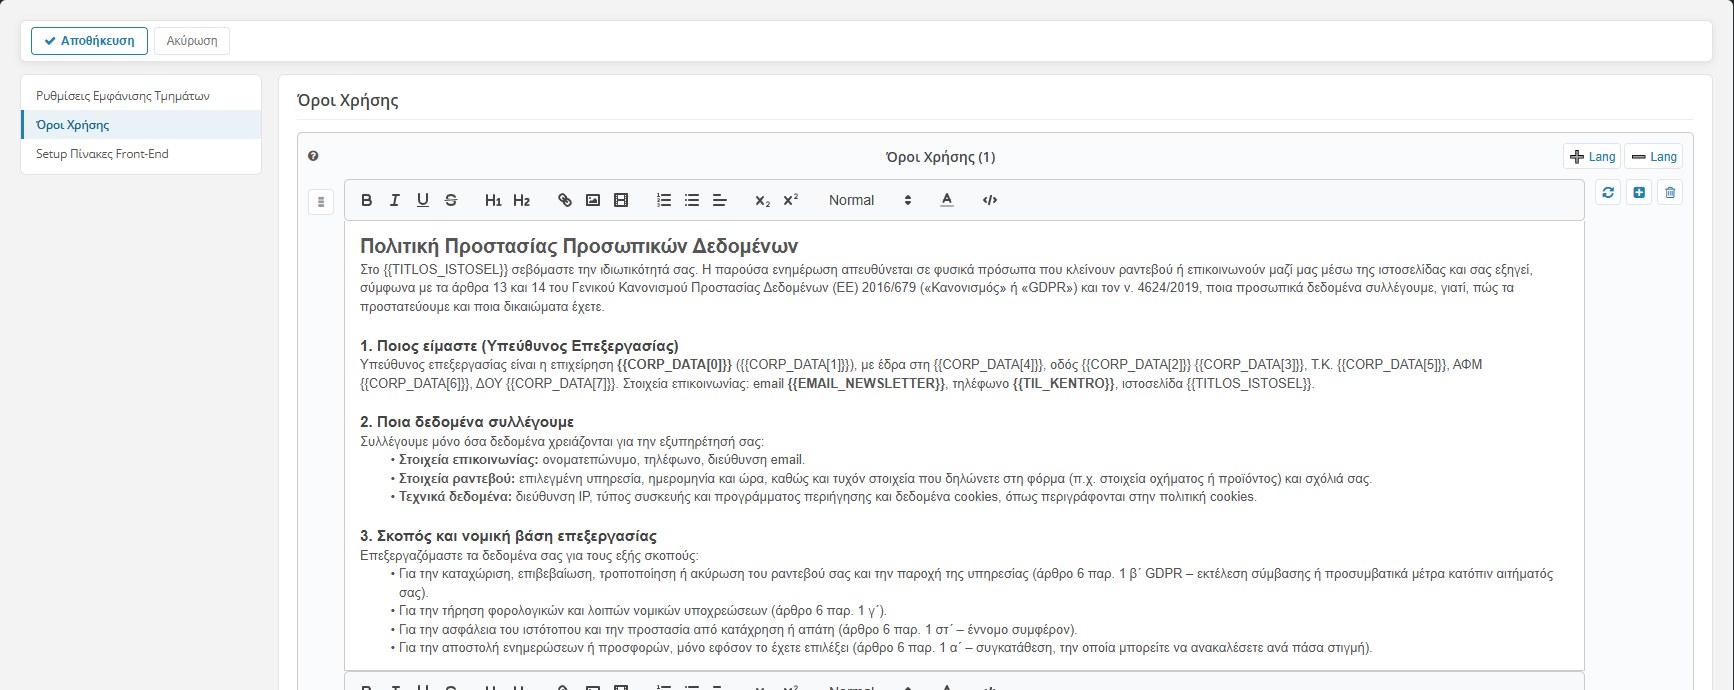
The editor contains the text that opens from the “personal data protection policy” link of the form. It has language tabs (+Lang / −Lang) and can contain variables such as {{TITLOS_ISTOSEL}}, which are replaced automatically with the store’s details (title, company details, email, phone).
Front-End Tables Setup
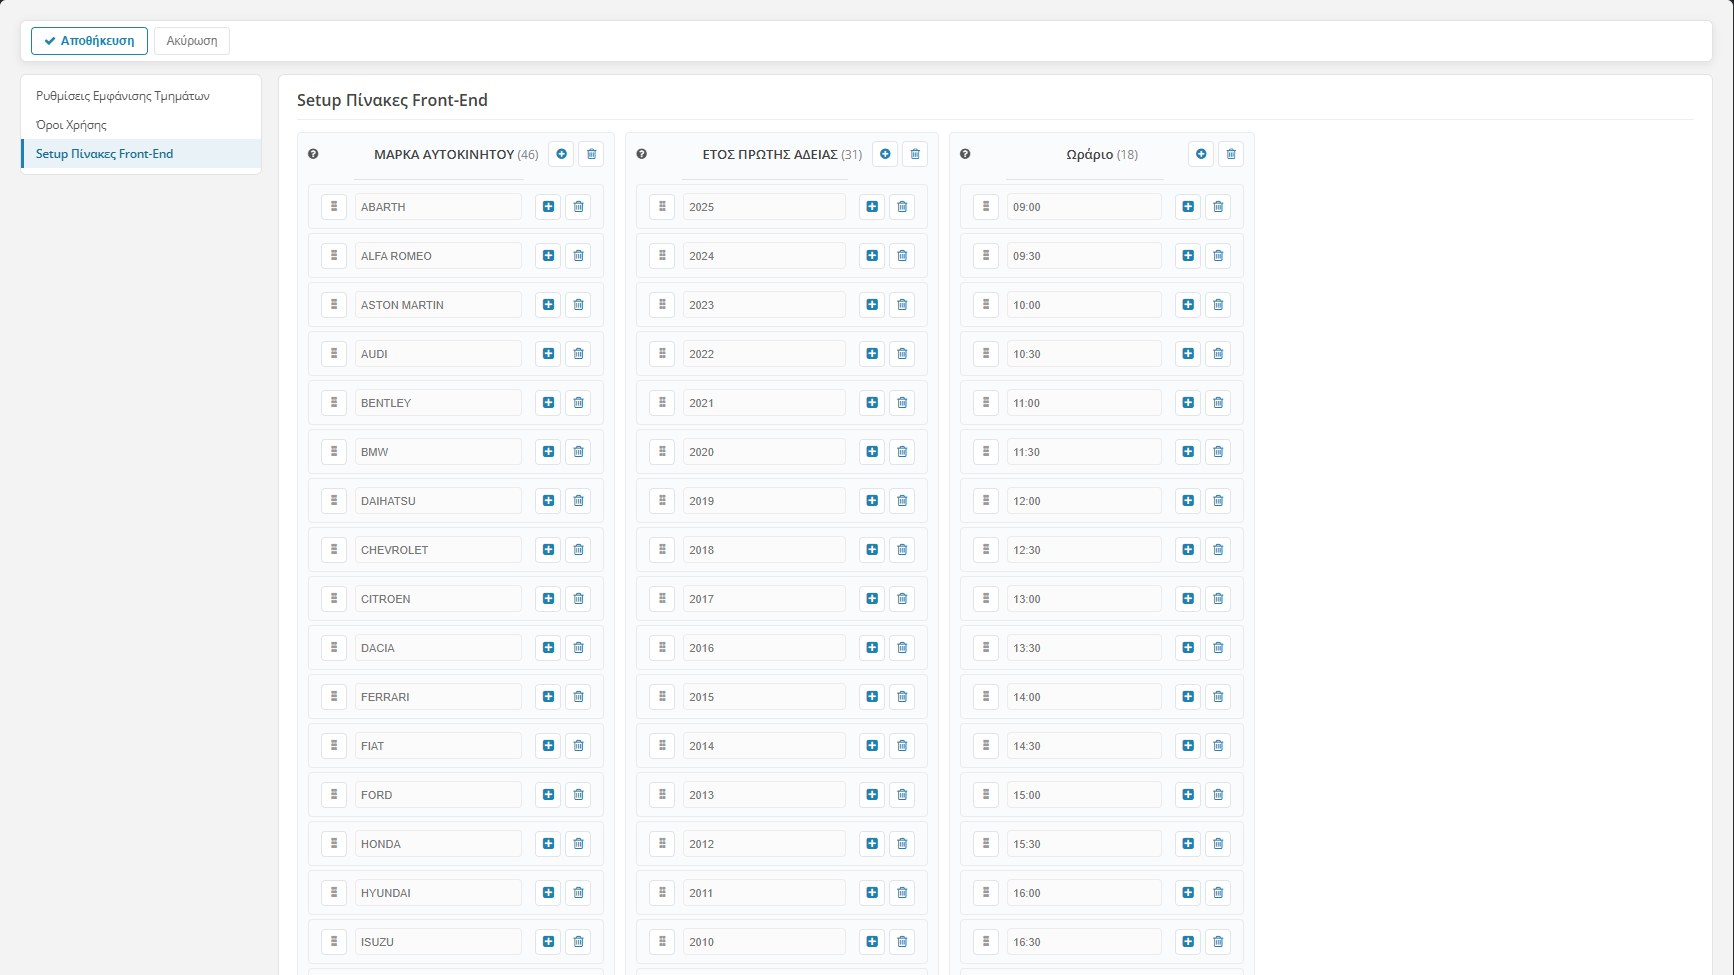
The form’s choice lists. In each one you add, rename, drag to change the order or delete items:
- Car make (46 in the default) and year of first registration (31).
- Working hours: the hours offered to the customer. In the default there are 18 hours, every half hour from 09:00 to 17:30. The working hours determine both the form’s hours and the rows of the schedule in the BE.
- Tasks: the list of tasks the customer can choose (it appears further down the page, together with the other lists).
The lists have separate values for Greek and English. If you don’t set English, an English-language customer sees the Greek.
Before you change the working hours: if you remove an hour in which there are already appointments, they may no longer appear in the daily schedule. Change the appointments first and then the working hours.